OneNote in 10 steps
Microsoft OneNote was alien to me just 6 months ago. I had several people telling me how great it was, but their stories never really convinced me to give it a go.
Now, I would not be without it. I use it everyday for note taking, planning, ideas creation, researching, to-do lists….you name the activity I’m probably doing some part of it using OneNote.
So….what changed?
Firstly, I took the time to learn a few basics – those which I will share with you in this post. Secondly, I began a new role requiring meticulous detail, planning, stakeholder management, task management and efficiency. Being honest, OneNote has been vital in helping keep me on the straight and narrow.
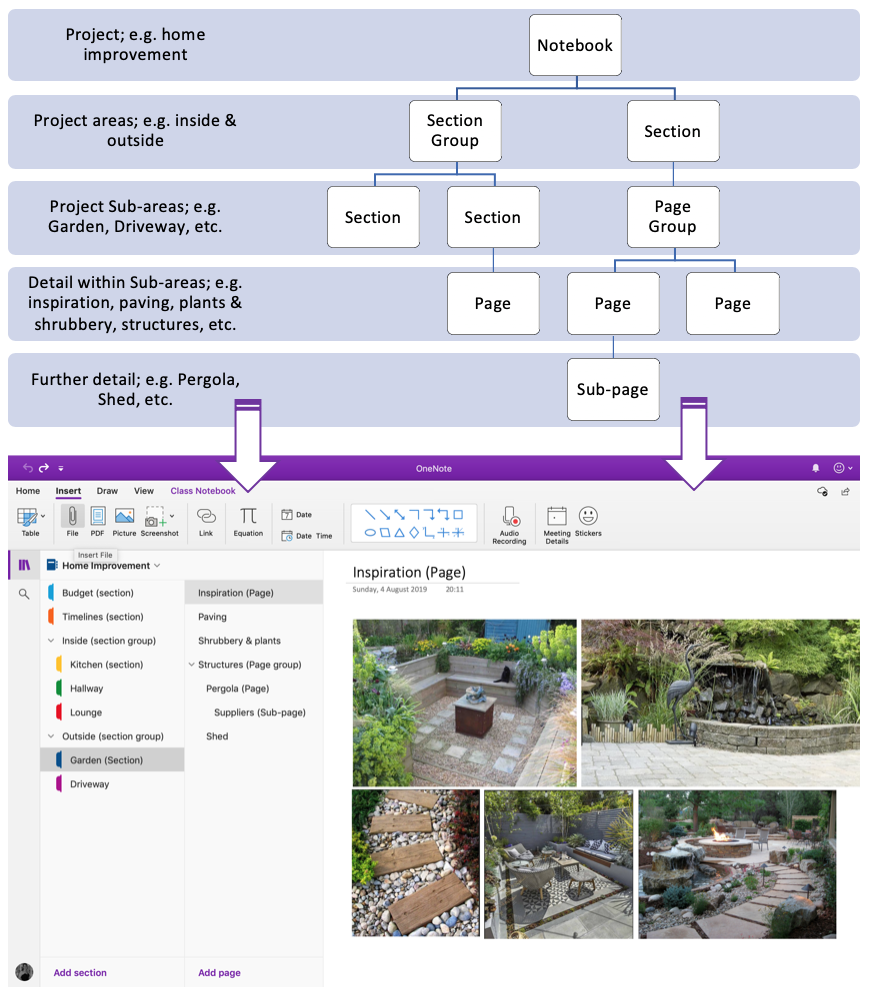
OneNote uses a logical hierarchical structure to help you organise your notes. In its simplest form, this hierarchy consists of a Notebook, then a Section, then a Page, then a sub-page. If you have not used OneNote before it is useful to understand this before starting out, although it is really simple to move around your notes if needed.
1. Create a new notebook by clicking File > New Notebook… or by pressing (Control+Command+N)
2. Choose a colour for your notebook, where to save it, name it, and create it.

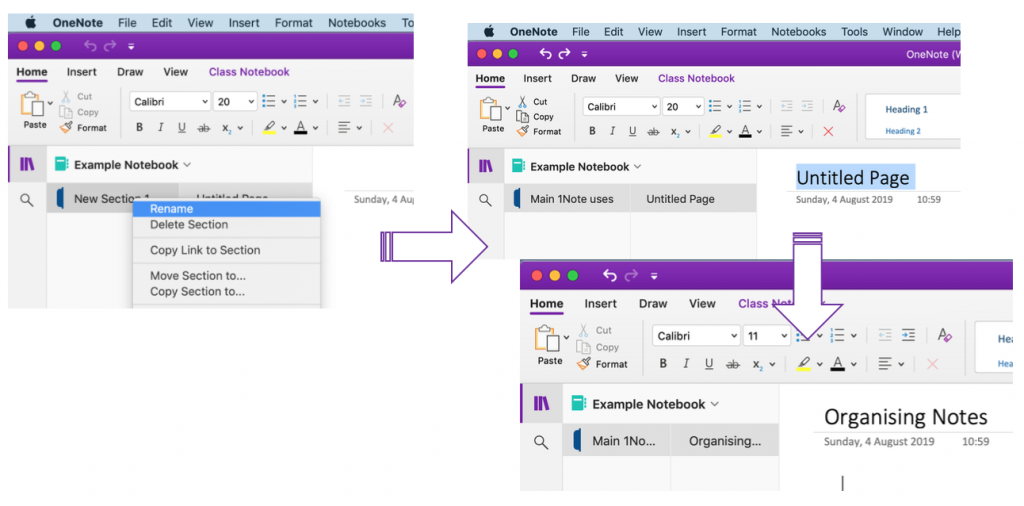
3. Name the first section of your notebook and your first page.
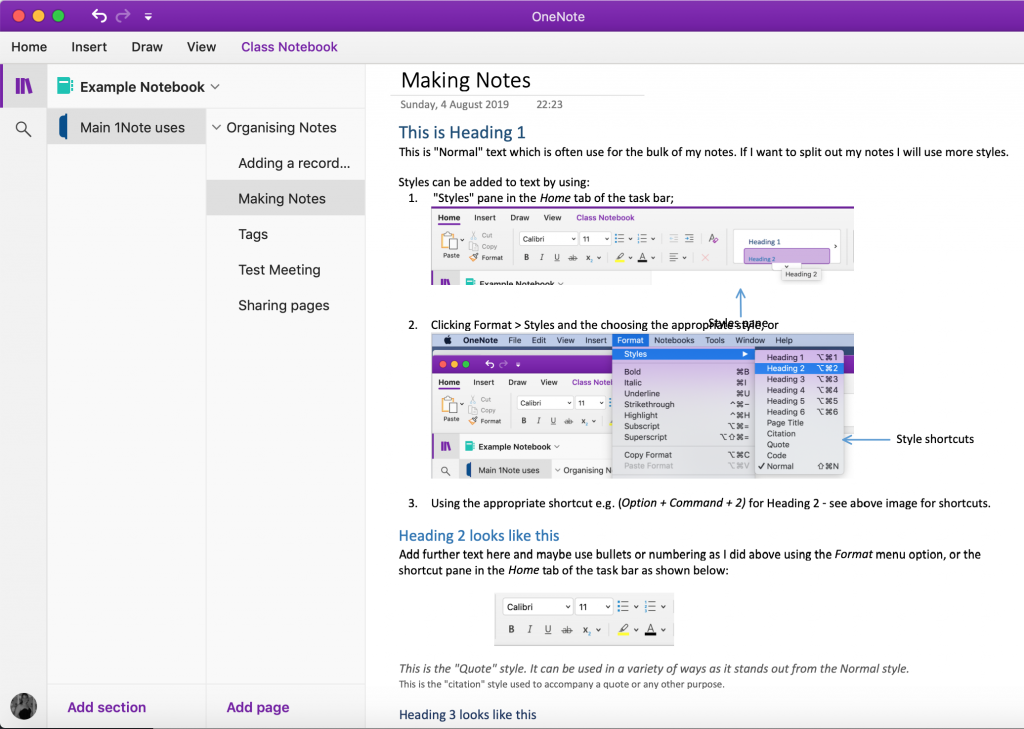
4. Start making your notes by typing. Using the Home tab you can add Styles to, and format, your text.
5. Use Tags to manage content. Tags are a really useful feature of OneNote. I use tags for a number of things including: (a) visual management of content; (b) enable effective navigation of content; and (c) group tags even though they may not be on the same page, section or even notebook.
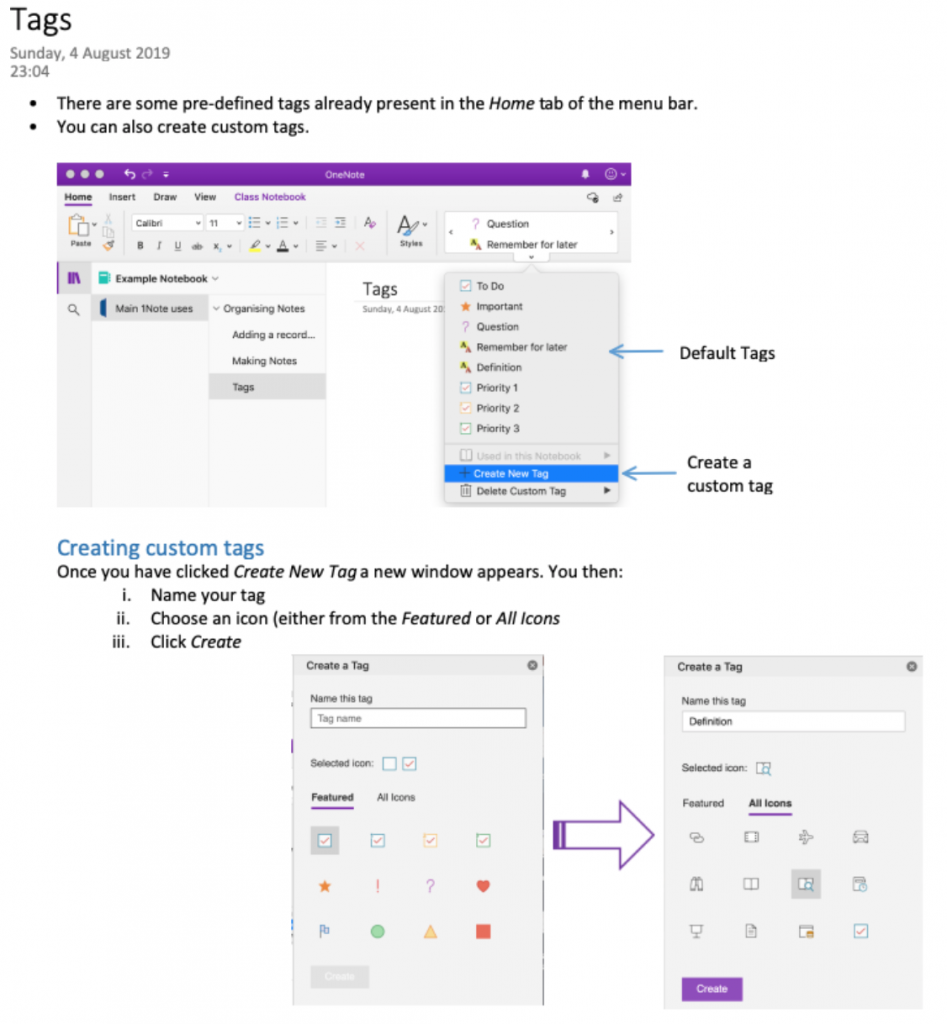
Once you have created the tags you need, you can use them in your notes to improve the effectiveness of your notes, and your productivity.

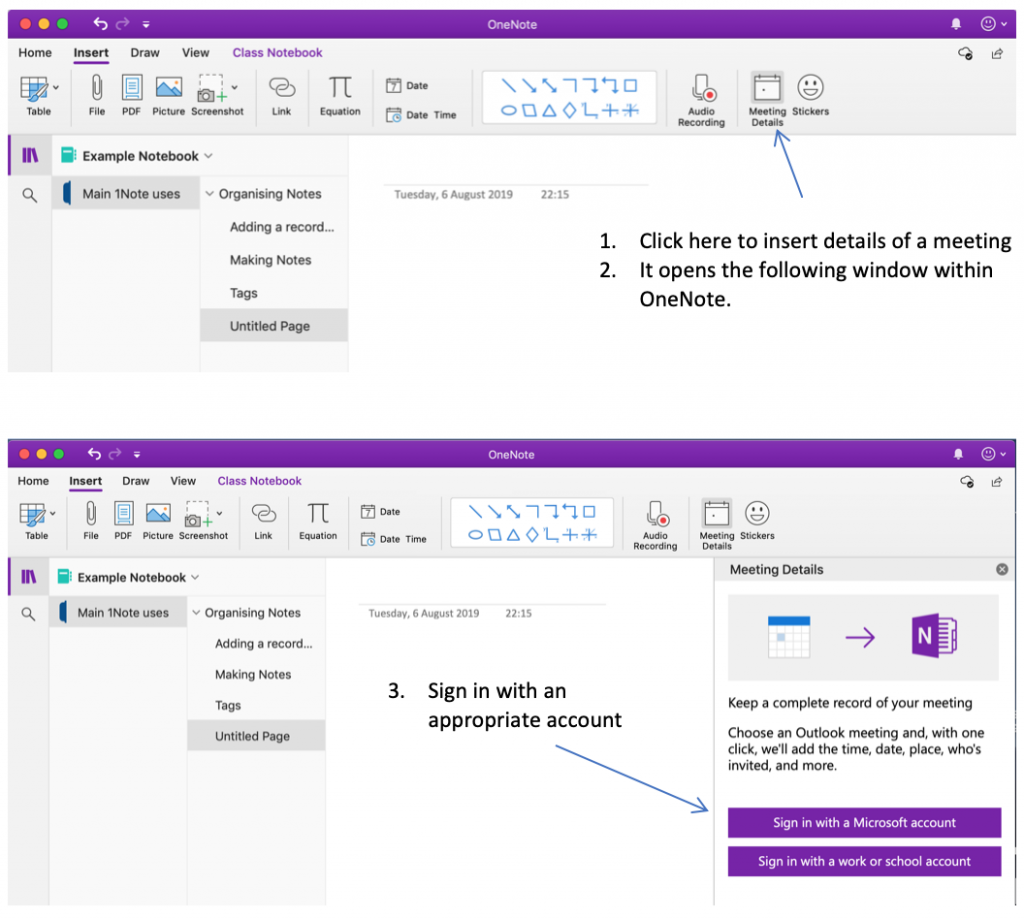
6. Add meeting details straight from your calendar.
One of my primary uses of OneNote is capturing meeting minutes. I find the ability to insert the meeting invite, including the invitation message, the participants, and also the ability to email out the minutes once complete, too easy to not use.
As soon as I discovered this feature I was sold, and there was NO looking back. It is so efficient – in that I can complete and send out meeting minutes immediately, no need to retype any information. I can use tags to help identify information e.g. actions, and even at a later date the content is easily searchable via OneNote’s search function. Just brilliant!!
I’ll cover more about meeting minutes in a later post. More important for now is how to find, insert and use this feature…
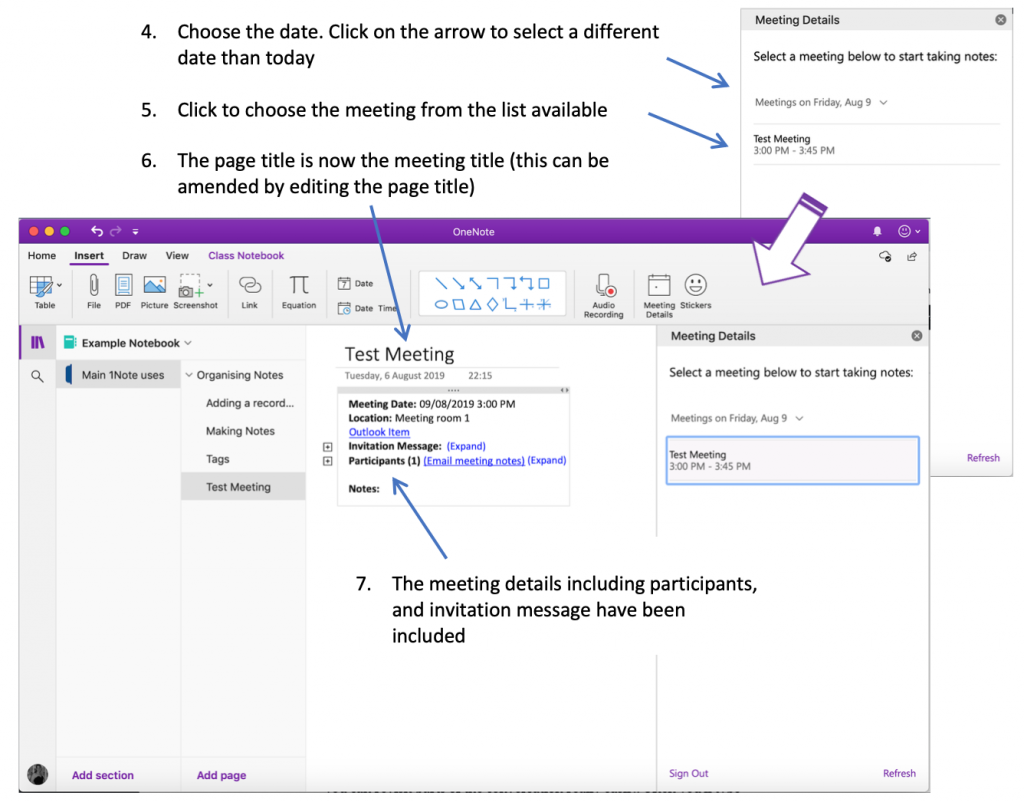
Once you have linked your Microsoft account to OneNote, select the meeting date and select the appropriate meeting from that day. Then start taking minutes. I have created a test example below:
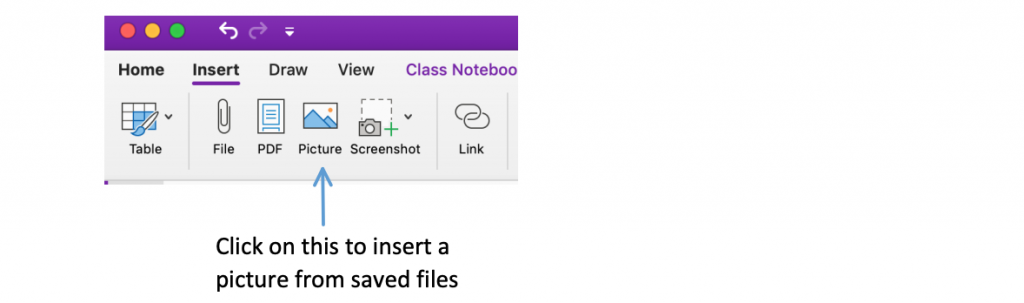
7. Add images.
Adding images to OneNote pages is an easy and simple process, particularly on a mac. The easiest way is dragging an image on to the page. The alternative is by adding a picture, as shown below:
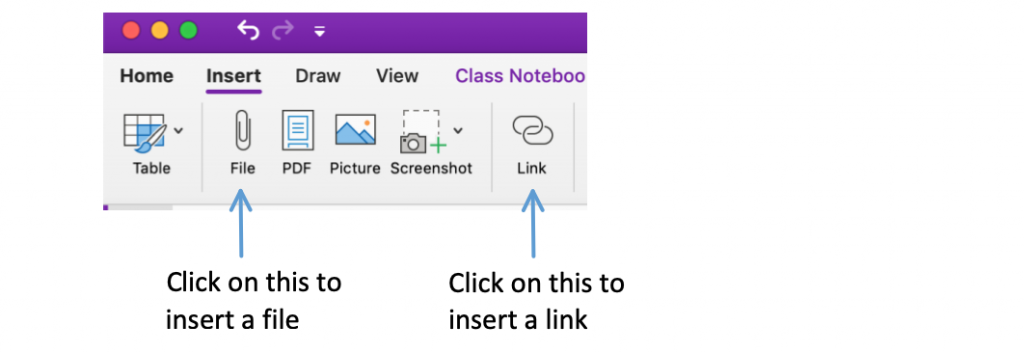
8. Add links to webpages, or files.
Similar to the inserting images, click on either the appropriate icon in the task bar, or click on Insert > File… or Insert > Link… from the OneNote menu bar.
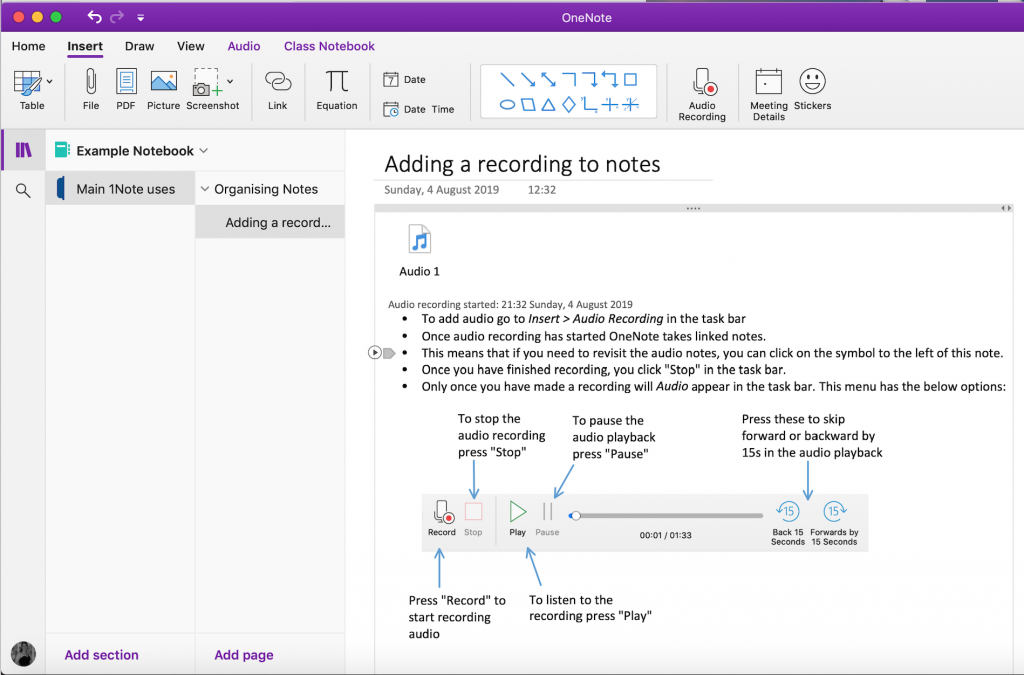
9. If you want to add an audio recording to your notes click on Insert > Audio Recording in the task bar. If you type notes in OneNote whilst recording audio, OneNote keeps a track of what you wrote, when. This means you can revisit parts of the conversation really easily – just click on the play button next to the note. Often you’ll type notes in response to someone talking, therefore you can navigate forwards or backwards in the audio using the controls in the Audio menu of the task bar.
10. Share your notebook with colleagues or other interested parties
The share feature only works with work or school Microsoft accounts. To access the share feature on the Mac, navigate to OneNote > OneNote Preferences > General. Then ensure the checkbox Enable Class Notebook is ticked to add a new tab Class Notebook to the OneNote task bar.

Once signed in to your work or school account you can use the features in this menu to share OneNote Notebooks and Pages with colleagues.
If you have found this article useful please do share it with your professional network.